什么是headscale
An open source, self-hosted implementation of the Tailscale control server
要说headscale肯定就要先说tailscale,这是一项VPN服务,可让您拥有的设备和应用程序在世界任何地方安全,轻松地访问。它支持使用开源 WireGuard 协议进行加密的点对点连接,这意味着只有专用网络上的设备才能相互通信。
也就意味着,在任意设备上安装tailscale之后,即可组建一个VPN网络,非常方便的达到内网穿透以及达成一些不可告人的目的。
为什么要安装headscale
tailscale是闭源的商业软件,客户端有上限(虽然一般人也用不到它的上限),而且服务器是定死的,国内连接的时候偶尔会有很大的延迟(基本都是200+,但是如果部署在国外就好一些,比如下面是我在南亚的服务器:
Bangalore: 17.85 ms
Singapore: 61.31 ms
Dubai: 77.91 ms
Hong Kong: 98.53 ms
Paris: 114.17 ms
Madrid: 116.31 ms
Frankfurt: 121.60 ms
Amsterdam: 121.80 ms
Tokyo: 124.99 ms
Warsaw: 126.75 ms
London: 135.55 ms
Sydney: 149.78 ms
Miami: 219.59 ms
Los Angeles: 220.80 ms
Denver: 225.65 ms
Seattle: 230.58 ms
Chicago: 238.62 ms
San Francisco: 242.12 ms
New York City: 246.40 ms
Dallas: 246.59 ms
Toronto: 251.18 ms
Nairobi: 280.36 ms
Honolulu: 292.43 ms
Johannesburg: 294.61 ms
São Paulo: 295.29 ms
而headscale则是tailscale的开源解决方案,这意味着所有的流量都只通过你的服务器,功能也任由你选择。 但是headscale有一点不好,它没有图形界面,这意味着需要全程在终端进行操作。
#####如何安装
######1.下载并配置
以debian为例,去https://github.com/juanfont/headscale/releases下载适合自己发行版和架构的版本(我没用deb包),下载到/usr/local/bin/并重命名为headscale。
当前最新版是0.22.3,即:
wget --output-document=/usr/local/bin/headscale https://github.com/juanfont/headscale/releases/download/v0.22.3/headscale_0.22.3_linux_amd64
之后再加上运行权限:
chmod +x /usr/local/bin/headscale
创建目录用来存储数据与证书:
mkdir -p /var/lib/headscale
创建空的 SQLite 数据库文件:
touch /var/lib/headscale/db.sqlite
创建配置目录并下载配置文件:
mkdir -p /etc/headscale && cd /etc/headscale
wget https://github.com/juanfont/headscale/raw/main/config-example.yaml -O /etc/headscale/config.yaml
然后修改配置文件
nano /etc/headscale/config.yaml
主要修改几个地方:
server_url: http://SERVERIP #SERVERIP改为公网IP地址 注意,此处直接修改为http://SERVERIP:PORT1便不会出现404问题
listen_addr: 0.0.0.0:PORT1 #PORT1默认8080,可改为连接的端口,之后连接会通过0.0.0.0:PORT1`进行,如果安装了防火墙记得放行端口
metrics_listen_addr: 0.0.0.0:PORT2 #PORT2默认9090,可改为连接的端口,之后连接会通过0.0.0.0:PORT2`进行,如果安装了防火墙记得放行端口
grpc_listen_addr: 0.0.0.0:50443
magic_dns: false #关闭magic_dns功能
ip_prefixes:
  - fd7a:115c:a1e0::/48 #自定义IPV6网段,如果用不到可以屏蔽此行
  - 10.64.0.0/16 #自定义IPV4网段
创建systemd守护程序
nano /etc/systemd/system/headscale.service
修改内容为:
[Unit]
Description=headscale controller
After=syslog.target
After=network.target

[Service]
Type=simple
User=headscale
Group=headscale
ExecStart=/usr/local/bin/headscale serve
Restart=always
RestartSec=5

# Optional security enhancements
NoNewPrivileges=yes
PrivateTmp=yes
ProtectSystem=strict
ProtectHome=yes
ReadWritePaths=/var/lib/headscale /var/run/headscale
AmbientCapabilities=CAP_NET_BIND_SERVICE
RuntimeDirectory=headscale

[Install]
WantedBy=multi-user.target
创建 headscale 用户:
useradd headscale -d /home/headscale -m
修改 /var/lib/headscale 目录的所有者:
chown -R headscale:headscale /var/lib/headscale
Reload SystemD 以加载新的配置文件:
systemctl daemon-reload
启动 Headscale 服务并设置开机自启:
systemctl enable --now headscale
tailscale 中有一个概念叫 tailnet,你可以理解成租户,租户与租户之间是相互隔离的,具体看参考 Tailscale 的官方文档:What is a tailnet。Headscale 也有类似的实现叫 namespace,即命名空间。我们需要先创建一个 namespace,以便后续客户端接入,例如:
headscale namespaces create default #此处命名空间为default
到此服务端部分基本配置完毕。 ######2.接入headscale 对于已经安装了tailscale的linux系统,可以直接执行
tailscale up --login-server=http://SERVERIP:PORT1 --accept-routes=true --accept-dns=false
如果之前已经接入过tailscale,需要执行:
tailscale up --login-server=http://SERVERIP:PORT1 --accept-routes=true --accept-dns=false --force-reauth
Windows操作其实也类似,按官网说法我们需要修改注册表,但其实我们只要进入软件的安装目录并右键启动Powershell,执行如下命令:
.\tailscale.exe up --accept-dns=false --accept-routes --login-server=http://SERVERIP:PORT1 --unattended
之后会提示:
To authenticate, visit:

	http://SERVERIP:PORT1/register/nodekey:xxxxxxxxxxxxxxxxxxxxxxxxxxxxxxxxxxxxxxxxxx
 把其中的
把其中的headscale nodes register --user USERNAME --key nodekey:xxxxxxxxxxxxxxxxxxxxxxxxxxxxxxxxxxxxxxxxxx
复制到服务器终端中,并修改USERNAME为命名空间,比如上面我们设置的是default。
执行之后服务器提示:
Machine xxx registered
客户端提示:
Success.
在服务器执行
headscale nodes list
可以看到客户端分配到的IP地址为100.64.0.1:
ID | Hostname  | Name      | MachineKey | NodeKey | User    | IP addresses | Ephemeral | Last seen           | Expiration          | Online | Expired
1  | xxx | xxx | [xxx]    | [xxx] | default | 100.64.0.1, | false     | 2023-09-13 15:47:03 | 0001-01-01 00:00:00 | online | no
相同的方法再添加第二个服务器,分配到ip:100.64.0.2
用进行互PING已经通了:
# ping 100.64.0.2
PING 100.64.0.2 (100.64.0.2) 56(84) bytes of data.
64 bytes from 100.64.0.2: icmp_seq=1 ttl=64 time=0.041 ms
64 bytes from 100.64.0.2: icmp_seq=2 ttl=64 time=0.042 ms
64 bytes from 100.64.0.2: icmp_seq=3 ttl=64 time=0.043 ms
64 bytes from 100.64.0.2: icmp_seq=4 ttl=64 time=0.046 ms
^C
--- 100.64.0.2 ping statistics ---
4 packets transmitted, 4 received, 0% packet loss, time 3057ms
rtt min/avg/max/mdev = 0.041/0.043/0.046/0.002 ms
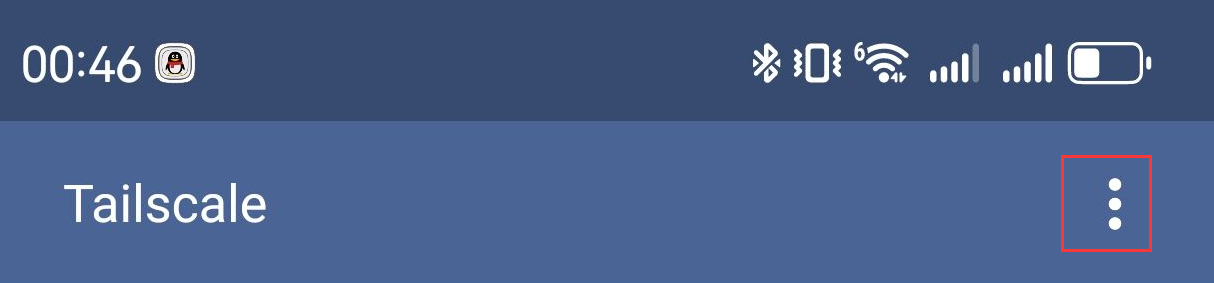
延迟很低,很好。 ######3.支持了哪些平台? 截至9月14日,基本已经实现了全平台支持,详情见https://github.com/juanfont/headscale。 官方tailscale在1.30.0之后的版本基本都实现了自定义url。 以安卓为例,打开应用程序后,必须反复打开和关闭右侧顶部栏上的烤肉串菜单图标(三个点),直到菜单中出现“更改服务器”选项。
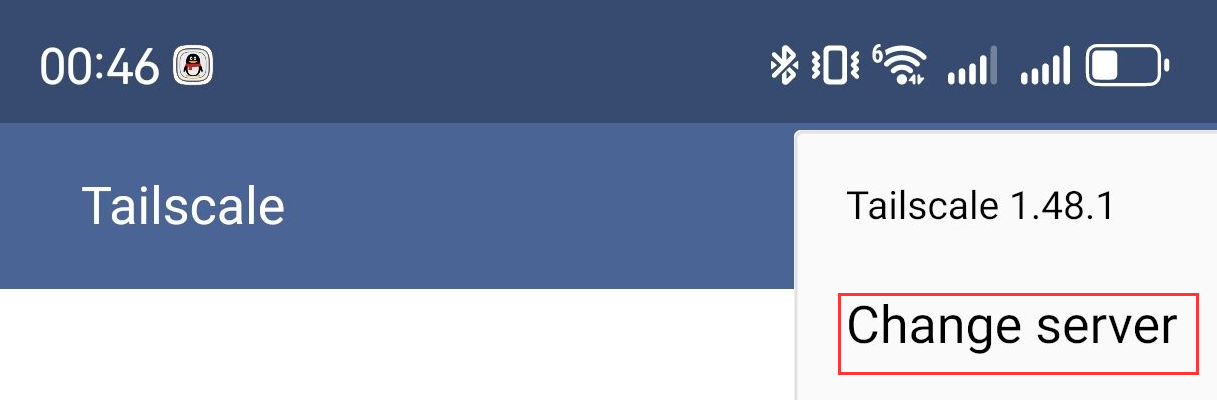 可以在此处输入
http://SERVERIP:PORT1。保存返回上一步,然后选择Sign in with other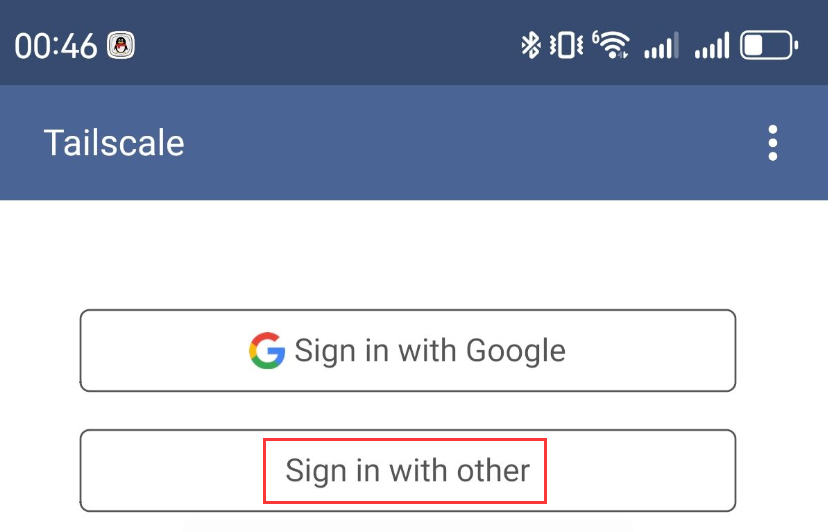 然后就一如既往的404了,使用浏览器打开这个网页,添加端口到IP后面再访问。
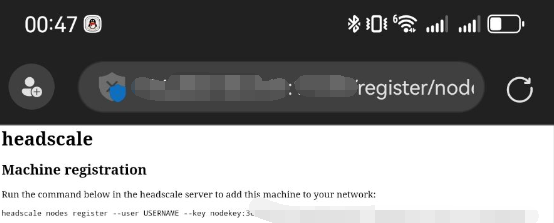 然后按照上面把那窜命令修改后复制到服务端执行,显示成功后安卓端杀掉tailscale进程,再重新进去之后就可以正常使用了。
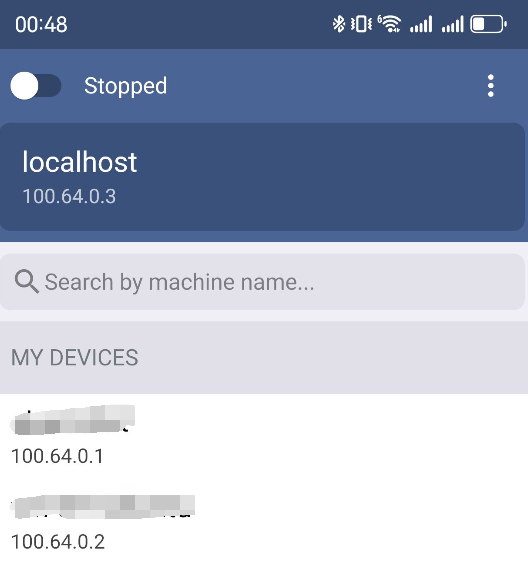 ######4.打通局域网
需求:假设本地里面有一台设备,headscale ip为
######4.打通局域网
需求:假设本地里面有一台设备,headscale ip为10.64.0.5,内网ip为192.168.50.79,但是我不想内网每台设备都接入headscale,希望通过10.64.0.5来打通局域网。
客户端(10.64.0.5)配置:
1.开启ipv4和ipv6转发echo 'net.ipv4.ip_forward = 1' | tee /etc/sysctl.d/ipforwarding.conf
echo 'net.ipv6.conf.all.forwarding = 1' | tee -a /etc/sysctl.d/ipforwarding.conf
sysctl -p /etc/sysctl.d/ipforwarding.conf
2.修改tailscale启动配置
tailscale up --login-server=http://SERVERIP:PORT1 --accept-routes=true --accept-dns=false --advertise-routes=192.168.50.0/24
其中http://SERVERIP:PORT1为上面的headscale服务器地址和ip,192.168.50.0/24是客户端的内网网段。
服务端(headscale服务器)
查看10.64.0.5的id
# headscale nodes list                         ID | Hostname             | Name                | MachineKey | NodeKey | User     | IP addresses                  | Ephemeral | Last seen           | Expiration          | Online  | Expired
5  | akarinbot            | akarinbot           | [WEJPM]    | [ETS1a] | tamaroot | 100.64.0.5, fd7a:115c:a1e0::1 | false     | 2023-09-14 03:58:37 | 0001-01-01 00:00:00 | online  | no
可以看到此处id为5。接下来查看该服务下的路由:
headscale routes list -i 5
# headscale routes list -i 1
ID | Machine   | Prefix          | Advertised | Enabled | Primary
7  | akarinbot | 192.168.50.0/24 | true       | false    | true
这里路由id为7,且Enabled状态为false。接下来开启这个路由
# headscale routes enable -r 7
此时Enabled状态为true。 现在在任意客户端访问192.168.50.0/24网段的ip都能联通了。 #####5.其他事项 如果deb包下载很慢,可以用其他软件下载:
https://pkgs.tailscale.com/stable/tailscale_{版本号}_{架构}.deb
例如:
https://pkgs.tailscale.com/stable/tailscale_1.56.1_amd64.deb