最近把编译用的主机换个发行版,最开始用的是debian,结果现在桌面环境进不去了(而且是一引导完成就所有输入、输入都没反应,但是ssh能登陆,很奇怪),懒得去查原因就选择换个环境。本来用的almalinux,无奈真的不喜欢gnome,自己装了kde之后ibus无论怎样都打不出中文,最后还是上了arch。 无论是宝塔还是lnmp.org都没有对arch系进行适配,网上也有很多一步步排错安装的教程,但是看着一步步的报错再去核查原因着实难受,最后还是选择自己装最基础的nginx+php+mysql。
安装nginx
archlinux软件包里面有nginx和nginx-mainline(当前最新是1.25.3)两个版本,nginx版本较老且两个版本之间有冲突,故安装nginx-mainline。
pacman -S nginx-mainline
安装完成后执行systemctl status nginx可能会提示
11月 30 10:04:16 bot nginx[17674]: 2023/11/30 10:04:16 [warn] 17674#17674: could not build optimal types_hash, you should increase either types_hash_max_size: 1024 or types_hash_bucket_size: 64; ignoring types_hash_bucket_size
需要修改/etc/nginx/nginx.conf,并在http块下添加types_hash_max_size 4096;,例如:
http {
...
    types_hash_max_size 4096;

    #gzip  on;
...
然后重启nginx:
systemctl retstart nginx
就不会报错了,访问也没问题。
安装php
执行
pacman -S php-fpm
安装最新的php模块,当前最新版本是8.2.13-1。安装php-fpm会自动把php一并安装好。
然后把php-fpm和nginx对接,修改/etc/nginx/nginx.conf:
把:
        #location ~ \.php$ {
        #    root           html;
        #    fastcgi_pass   127.0.0.1:9000;
        #    fastcgi_index  index.php;
        #    fastcgi_param  SCRIPT_FILENAME  /scripts$fastcgi_script_name;
        #    include        fastcgi_params;
        #}
修改为:
        location ~ \.php$ {
            root           /usr/share/nginx/html;
            fastcgi_pass   unix:/run/php-fpm/php-fpm.sock;
            fastcgi_index  index.php;
            fastcgi_param  SCRIPT_FILENAME  $document_root$fastcgi_script_name;;
            include        fastcgi_params;
        }
然后测试配置文件是否正常:
nginx -t
并将相应服务启动/重启:
systemctl enable php-fpm
systemctl start php-fpm
systemctl restart nginx  #或nginx -s reload
然后到网站root目录/usr/share/nginx/html下放一个探针:
cd /usr/share/nginx/html
wget https://raw.githubusercontent.com/582033/monitor/master/monitor.php
然后访问ip/monitor.php:
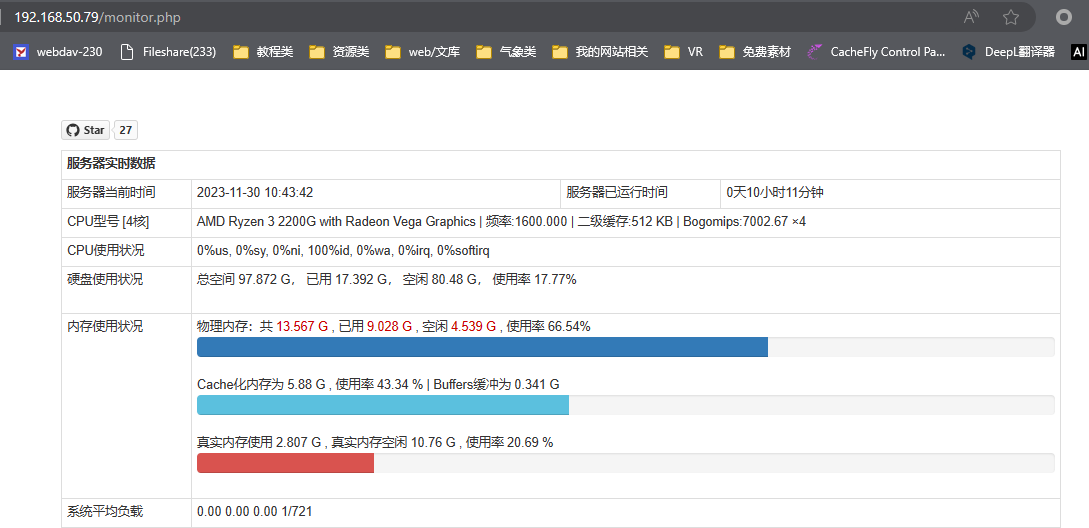 如果显示得出来说明nginx和php-fpm已经对接上了。
安装mysql
先启动php下mysql的相关拓展:
修改/etc/php/php.ini
;extension=mysqli
;extension=odbc
;zend_extension=opcache
;extension=pdo_dblib
;extension=pdo_mysql
修改成
extension=mysqli
;extension=odbc
;zend_extension=opcache
;extension=pdo_dblib
extension=pdo_mysql
安装mariadb:
pacman -S mariadb
初始化mysqldb的数据目录:
mysql_install_db --user=mysql --basedir=/usr --datadir=/var/lib/mysql
启动mysql服务:
systemctl enable mysqld
systemctl start mysqld
运行安全脚本配置:
mysql_secure_installation
各项内容根据实际修改:
/usr/bin/mysql_secure_installation: Deprecated program name. It will be removed in a future release, use 'mariadb-secure-installation' instead

NOTE: RUNNING ALL PARTS OF THIS SCRIPT IS RECOMMENDED FOR ALL MariaDB
      SERVERS IN PRODUCTION USE!  PLEASE READ EACH STEP CAREFULLY!

In order to log into MariaDB to secure it, we'll need the current
password for the root user. If you've just installed MariaDB, and
haven't set the root password yet, you should just press enter here.

Enter current password for root (enter for none):   #输入mysql root密码 默认是空,直接回车
OK, successfully used password, moving on...

Setting the root password or using the unix_socket ensures that nobody
can log into the MariaDB root user without the proper authorisation.

You already have your root account protected, so you can safely answer 'n'.

Switch to unix_socket authentication [Y/n]      #是否切人到unix_socket认证,默认是,直接回车。
Enabled successfully!
Reloading privilege tables..
 ... Success!


You already have your root account protected, so you can safely answer 'n'.

Change the root password? [Y/n]    #是否修改root密码,默认是,直接回车。
New password:       #输入新的root密码
Re-enter new password:          #再次输入新的root密码
Password updated successfully!
Reloading privilege tables..
 ... Success!


By default, a MariaDB installation has an anonymous user, allowing anyone
to log into MariaDB without having to have a user account created for
them.  This is intended only for testing, and to make the installation
go a bit smoother.  You should remove them before moving into a
production environment.

Remove anonymous users? [Y/n]    #是否删除匿名用户,默认是
 ... Success!

Normally, root should only be allowed to connect from 'localhost'.  This
ensures that someone cannot guess at the root password from the network.

Disallow root login remotely? [Y/n] n        #是否禁用远程登陆,我有需求,这里填否
 ... skipping.

By default, MariaDB comes with a database named 'test' that anyone can
access.  This is also intended only for testing, and should be removed
before moving into a production environment.

Remove test database and access to it? [Y/n]            #是否移除测试数据库,默认是
 - Dropping test database...
 ... Success!
 - Removing privileges on test database...
 ... Success!

Reloading the privilege tables will ensure that all changes made so far
will take effect immediately.

Reload privilege tables now? [Y/n]        #是否刷新权限,默认是
 ... Success!

Cleaning up...

All done!  If you've completed all of the above steps, your MariaDB
installation should now be secure.

Thanks for using MariaDB!
输入新的root密码测试登陆mysql:
# mysql -u root -p
mysql: Deprecated program name. It will be removed in a future release, use '/usr/bin/mariadb' instead
Enter password:
Welcome to the MariaDB monitor.  Commands end with ; or \g.
Your MariaDB connection id is 12
Server version: 11.2.2-MariaDB Arch Linux

Copyright (c) 2000, 2018, Oracle, MariaDB Corporation Ab and others.

Type 'help;' or '\h' for help. Type '\c' to clear the current input statement.

MariaDB [(none)]> quit;
Bye
确认一切正常,最后重启所有相关服务:
systemctl restart mysqld
systemctl restart php-fpm
systemctl restart nginx
至此所有步骤均完成。
优化配置(可选)
1、对于/etc/nginx/nginx.conf:
在http块下新增:
client_max_body_size 10m;
2、对于/etc/php/php.ini:
修改
upload_max_filesize = 2M
成
upload_max_filesize = 20M
3、安装phpmyadmin: 去phpmyadmin官网下载最新版安装包,目前是5.2.1:
cd /usr/share/nginx/hmtl
wget https://files.phpmyadmin.net/phpMyAdmin/5.2.1/phpMyAdmin-5.2.1-all-languages.zip
unzip phpMyAdmin-5.2.1-all-languages.zip
mv phpMyAdmin-5.2.1-all-languages phpmyadmin
cd phpmyadmin
cp config.sample.inc.php config.inc.php
然后修改配置文件config.inc.php:
$cfg['blowfish_secret'] = '任意字符串';
$cfg['Servers'][$i]['host'] = '127.0.0.1';
修改nginx的配置/usr/nginx/nginx.conf,添加以下内容:
        location /phpmyadmin {
           alias /usr/share/nginx/html/phpmyadmin;
           index index.php;
         }
         location ~ /phpmyadmin/.+\.php$ {
            if ($fastcgi_script_name ~ /phpmyadmin/(.+\.php.*)$) {
               set $valid_fastcgi_script_name $1;
            }
           include fastcgi_params;
           fastcgi_pass unix:/run/php-fpm/php-fpm.sock;
           fastcgi_index index.php;
           fastcgi_param SCRIPT_FILENAME /usr/share/nginx/html/phpmyadmin/$valid_fastcgi_script_name;
          }
然后重启nginx和php
systemctl restart nginx
systemctl restart php-fpm
可能会提示”缺少 mysqli 扩展“,请检查拓展的位置是否配置正确了。
# find / -name mysqli*

/usr/lib/php/modules/mysqli.so
可以看到拓展实际上位于/usr/lib/php/modules/这个位置下,那就把/etc/php/php.ini中的
extension=mysqli
修改成
extension=/usr/lib/php/modules/mysqli.so
重启php-fpm服务即可正常运行。